Editing a client later
Opening an existing client shows everything on one page instead of as steps, so you can correct a single field without walking through the wizard again.
This guide follows the real order of work: register a client, agree the terms, plan the session, run it, write it up, and export your hours. Keep it open in this tab and the app in the other — each section names the exact buttons you are looking for.
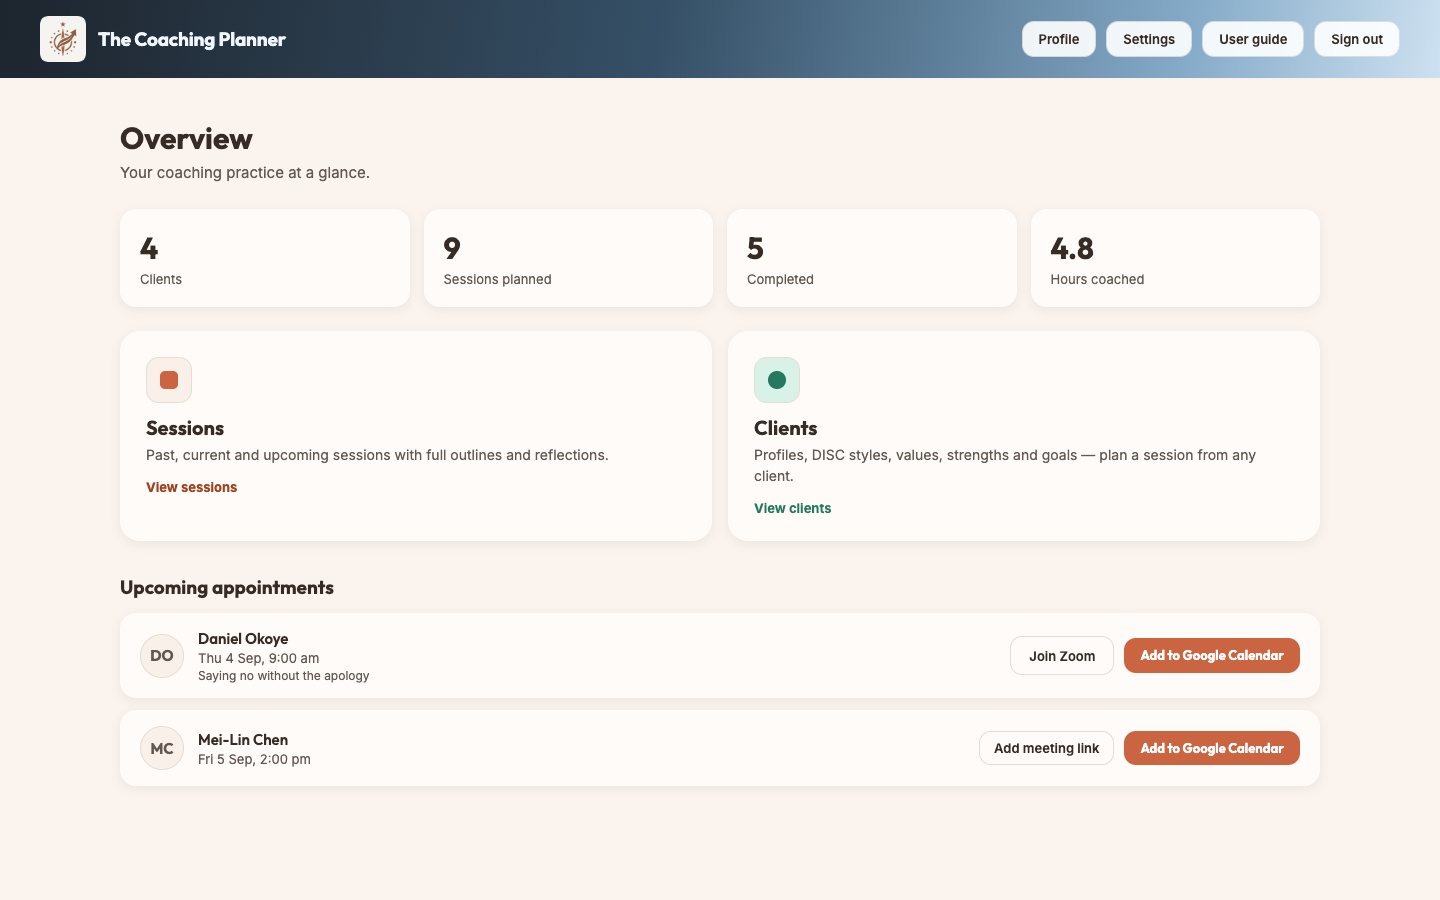
The app has four places: the dashboard, Clients, Sessions and Settings. On a phone they are the tabs along the bottom; on a laptop they are cards and header buttons. The dashboard is a summary, not a working screen — your counts of clients, planned sessions and hours coached sit at the top, with anything happening today underneath.
Client profiles are the raw material for every session plan, so this is where to start. + New client on the Clients screen opens four short steps rather than one long form, and the client is created the moment you finish the first one — you can stop at any point and pick up the rest later from their page.
Opening an existing client shows everything on one page instead of as steps, so you can correct a single field without walking through the wizard again.
Import CSV on the Clients screen adds many clients at once. Export CSV takes them all back out again.
Dominance, Influence, Steadiness or Conscientiousness shapes the tone and pacing of generated plans. Set it even if you are unsure and adjust later.
Fill in your practice details and standard terms once under Settings, and every agreement you create afterwards arrives prefilled — your details, the client's name and address, and their goal.
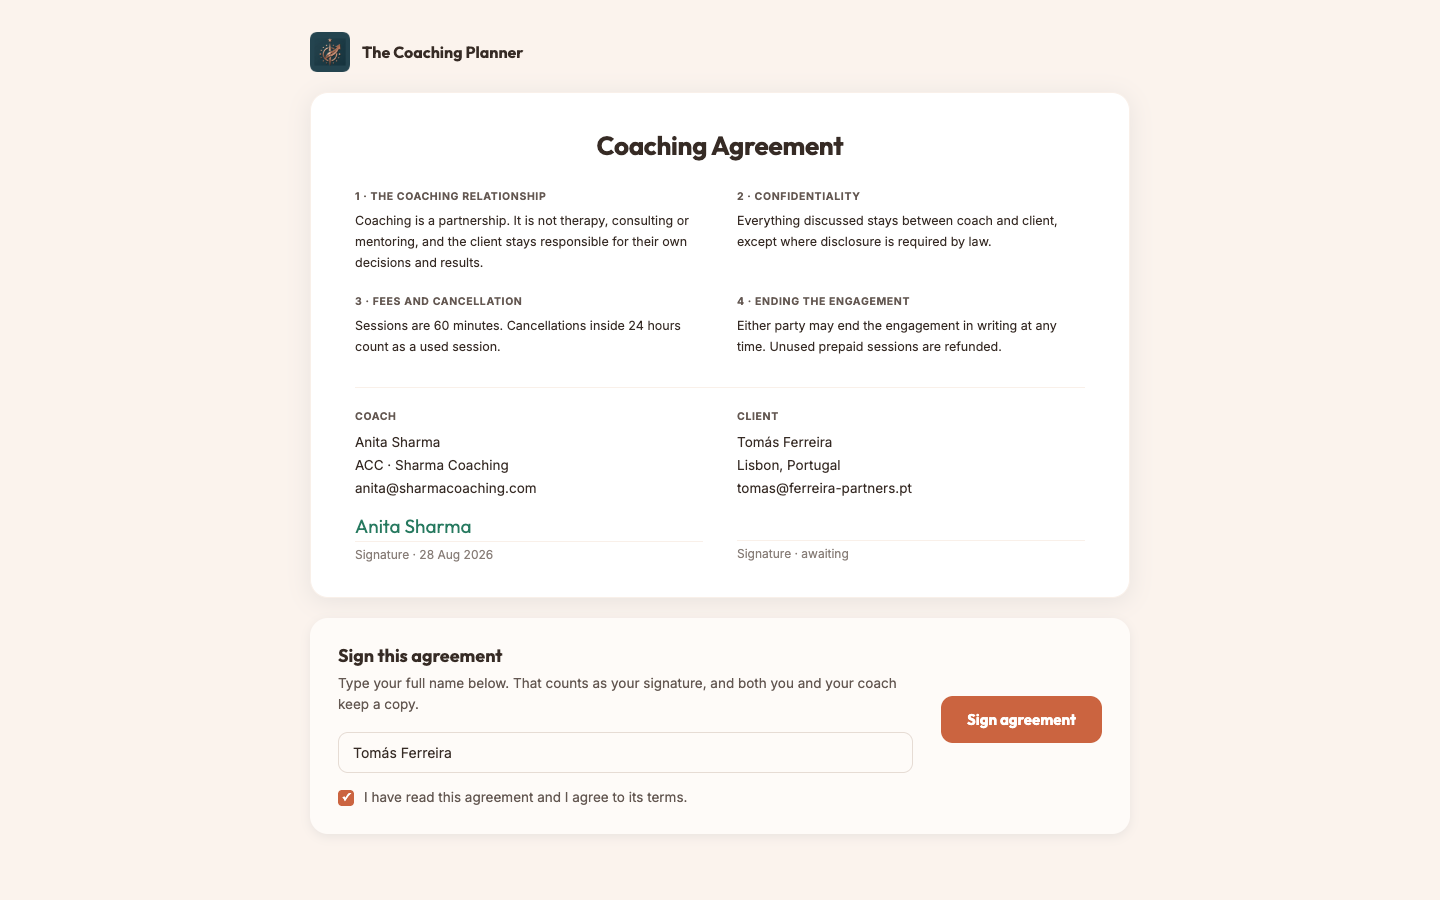
Created but not sent. Edit it freely.
The link is live and waiting for a signature.
Locked. If terms change, start a new agreement rather than editing this one.
One link per client, created either at step 3 of adding them or later from their page. It asks the DISC questions plus values, strengths and goals — the same fields you would otherwise type yourself. On Pro and Mentor you can also add questions of your own and choose which of them each client is asked.
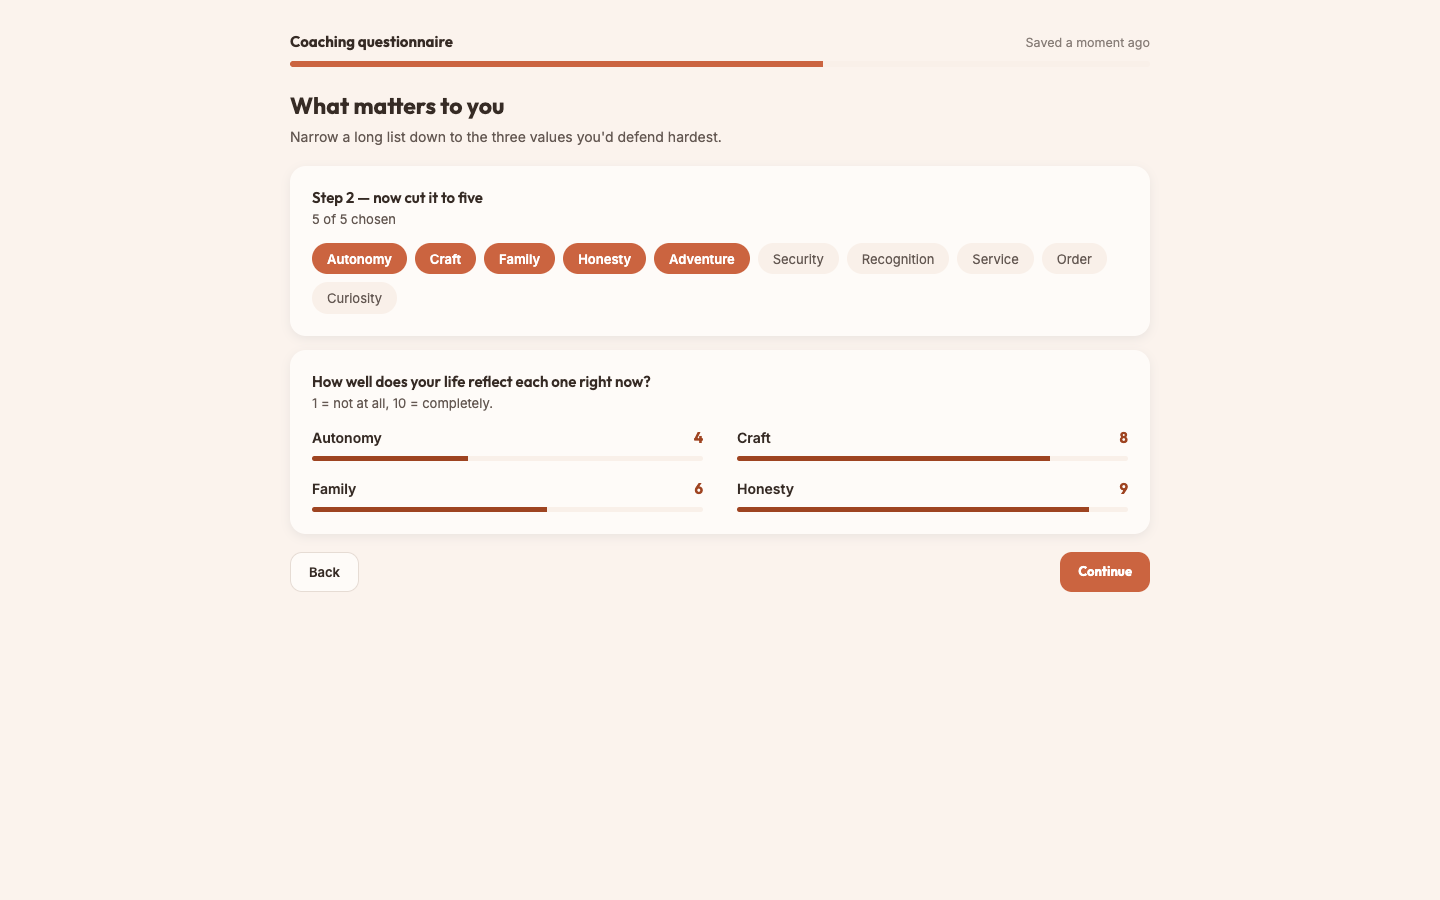
Written once in Settings → Question bank and reused. Nothing is sent to a client until you tick it for them, so a new client starts with the built-in questionnaire only. Six kinds of answer: long or short text, yes/no, choose one, choose any, and a 1–10 scale.
You can add or remove questions after sending, and the client sees the change next time they open the link. An answer always keeps the question it was an answer to, so rewording or deleting a question in your bank never rewrites something a client has already told you. Once they submit, the questionnaire is fixed.
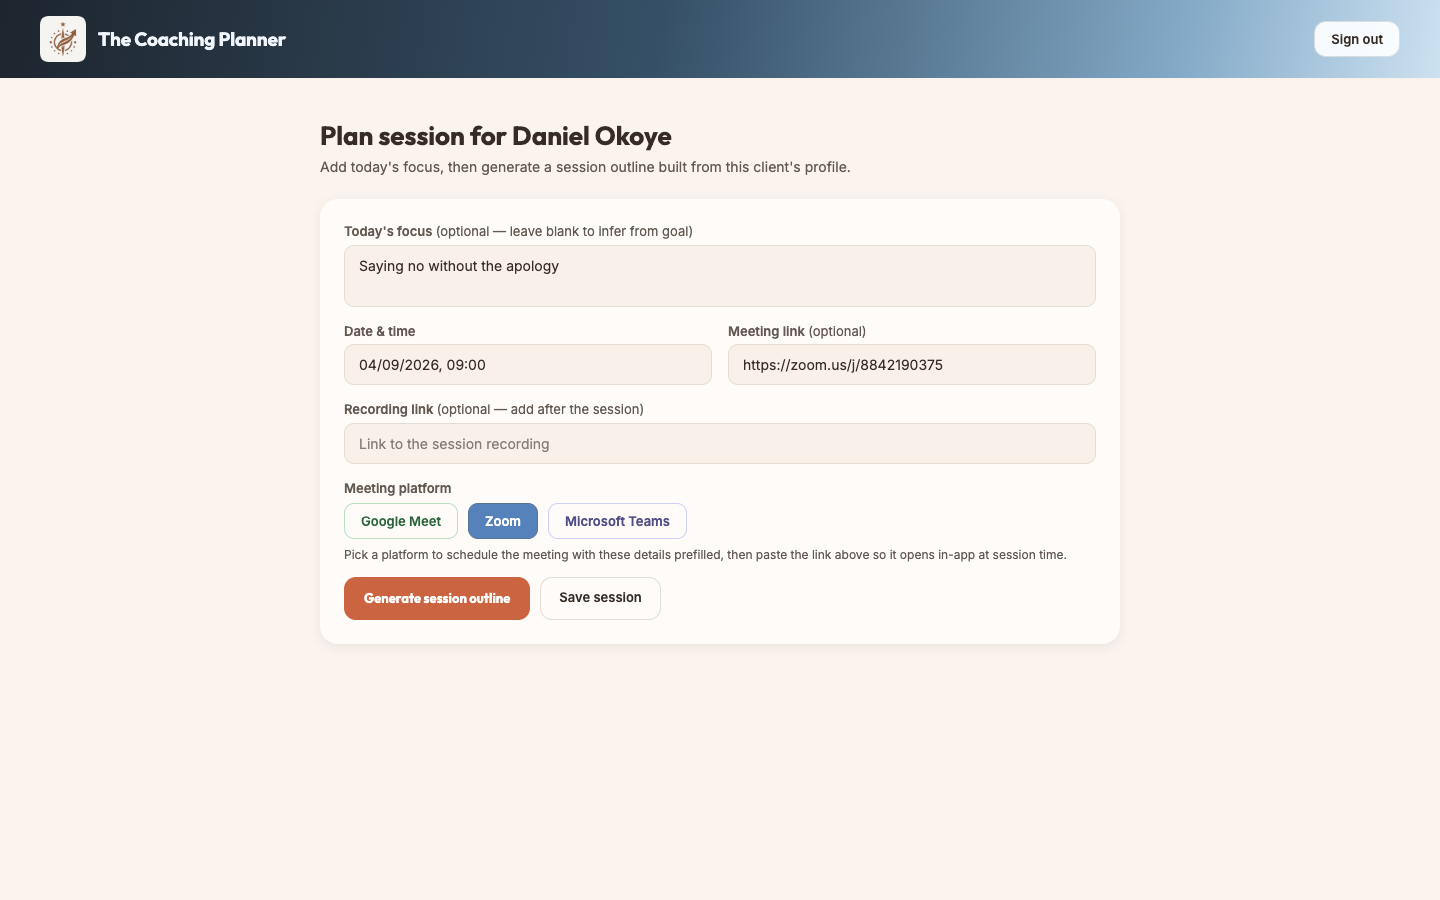
A session is a date, a length, a type and an optional focus. Everything the client has told you is already attached to it, so the plan is built from their profile rather than from a blank page.
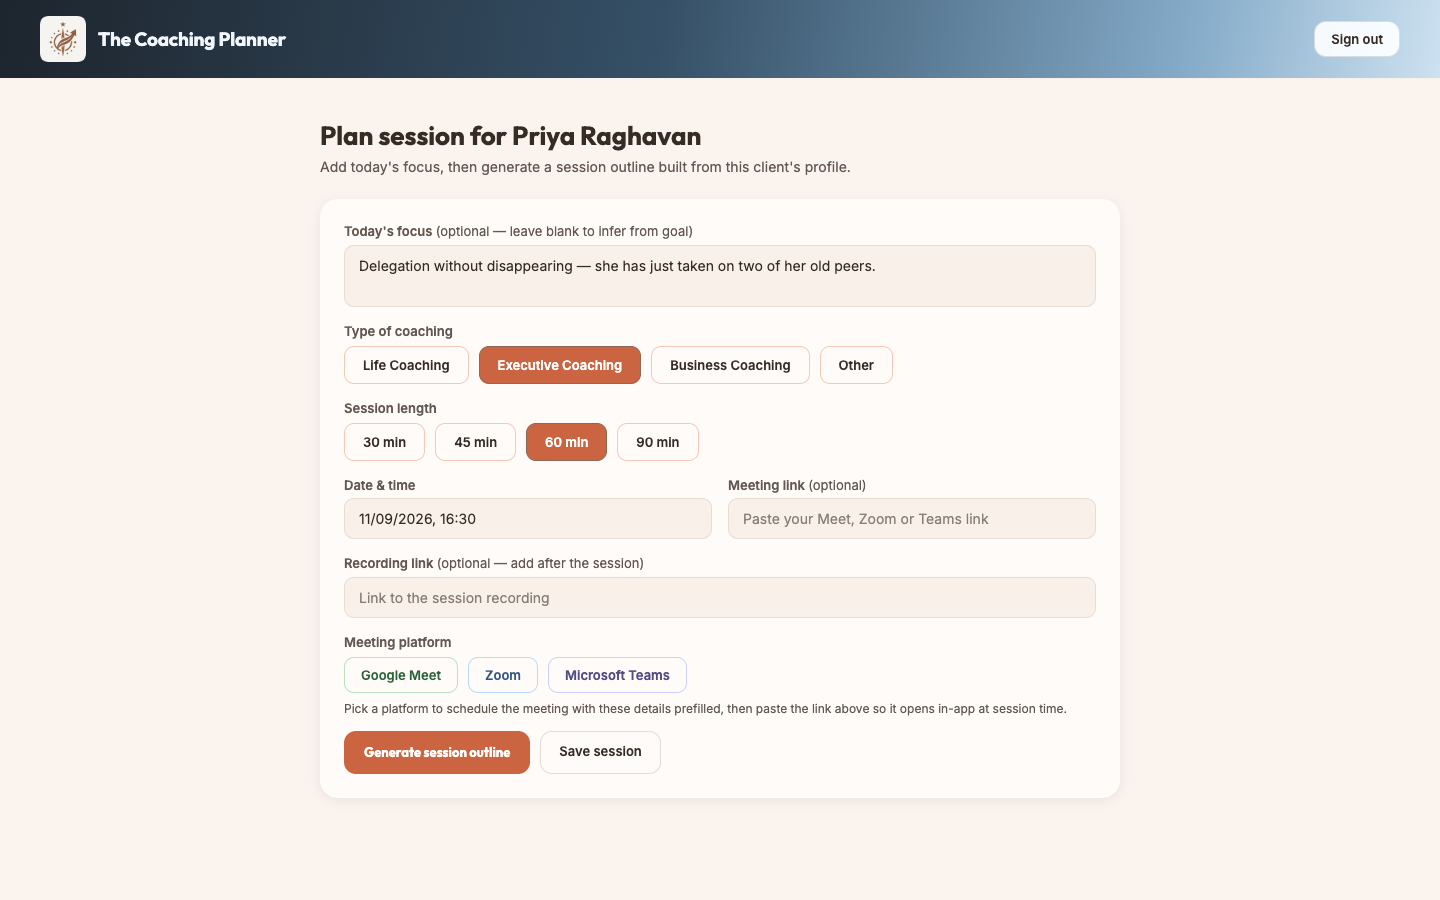
The generated outline follows a five-phase structure, with timings that add up to the length you chose. Treat it as a draft written by an assistant who has read the profile: useful, and yours to change.
| Phase | What it covers |
|---|---|
| Connection | Open the space and settle the client. |
| Outcome | Agree what this session must produce. |
| Discover | Explore, with suggested tools and questions. |
| Action | Commit to what happens next. |
| Progress | Close, and check progress against the goal. |
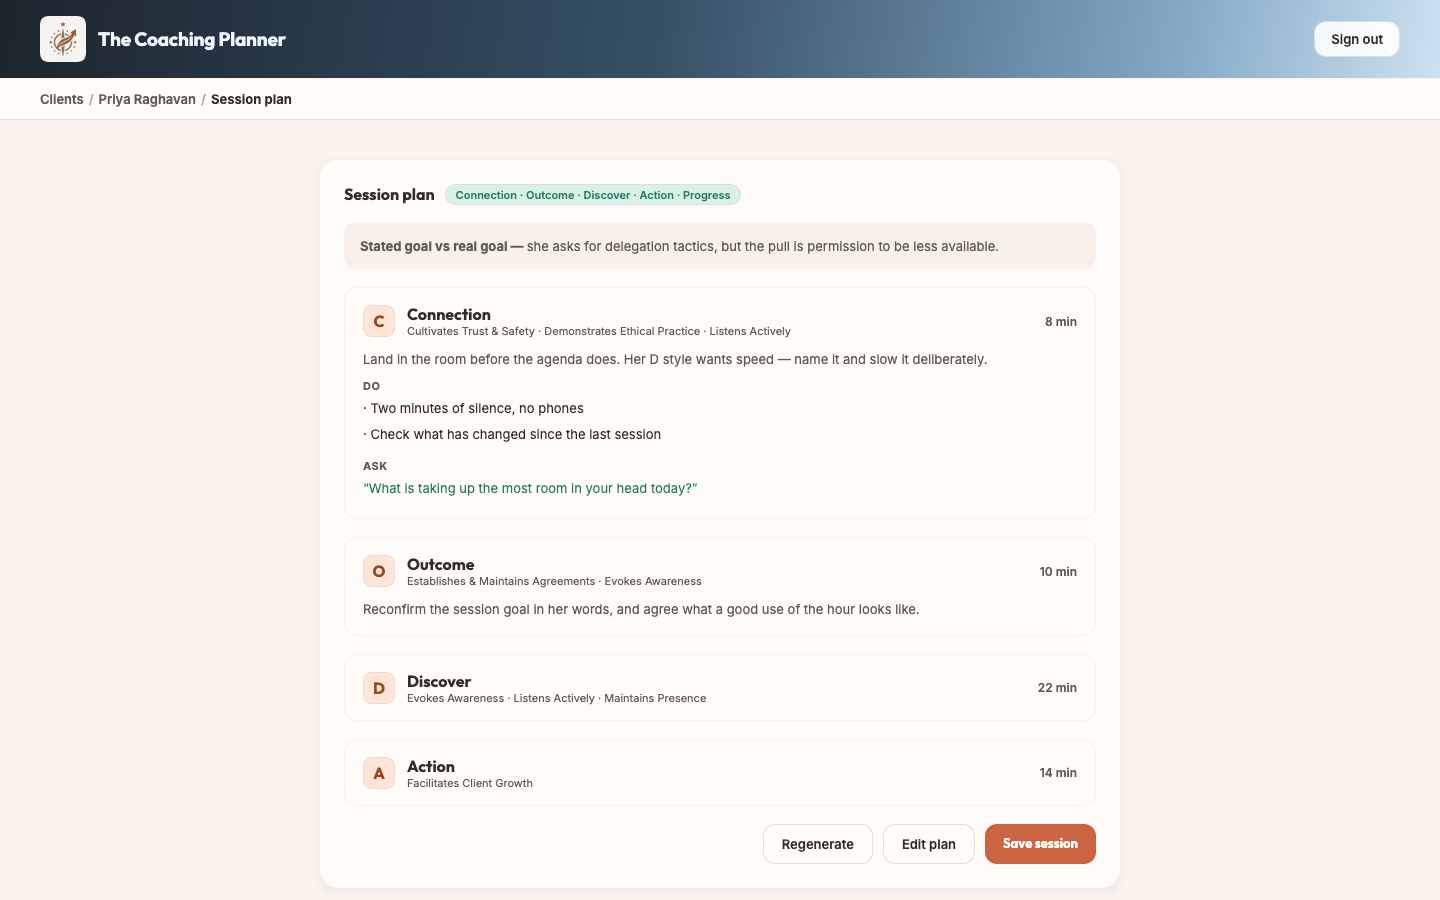
Sessions carry the video link, so you are not hunting for it on the day.
The Sessions screen holds every session across every client, grouped as in progress now, upcoming and past. It is the screen to work from on a normal day.
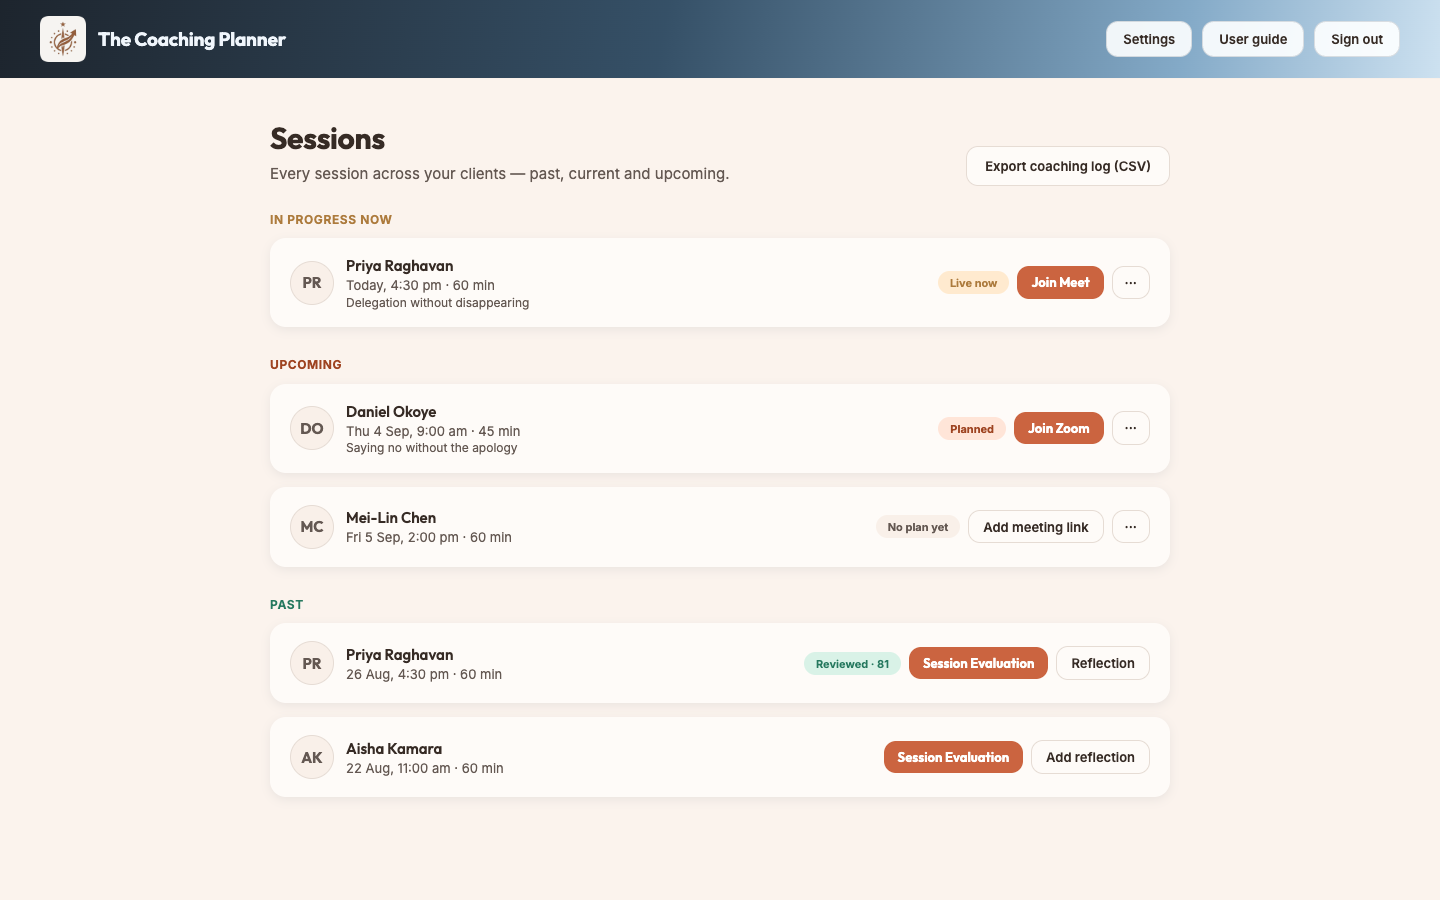
Each session shows the one action you are most likely to want, and keeps the rest behind the ··· button. What is on offer depends on whether the session has happened yet.
| Session | On the card | Behind ··· |
|---|---|---|
| Upcoming or today | Join Meet / Zoom / Teams, or Add meeting link when there isn't one yet | Session Evaluation, session log, edit meeting link, generate or regenerate plan, edit session, delete |
| Already happened | Session Evaluation and Complete session log (or View session log) | Edit meeting link, generate or regenerate plan, edit session, delete |
| Button | What it does |
|---|---|
| Join Meet / Zoom / Teams | Opens the meeting link attached to the session. |
| Session Evaluation | Scores the session against the ICF PCC Markers from a recording or transcript. See below. |
| Complete session log | Opens the write-up form for a session you have run. |
| View session log | Shown instead once a log has been saved. |
| Edit meeting link | Changes the video link on the session. |
| Edit session | Changes the date, time, length, type, topic and links. See below. |
| Generate plan | Builds the outline for a session that does not have one yet. |
| Regenerate plan | Replaces the existing outline with a fresh one. |
| Delete session | Removes the session. This cannot be undone. |
Sessions move. Everything you set when planning stays editable, whether the session is still upcoming or already happened.
The log is your write-up of what happened, and it is what fills your exported coaching log. Doing it the same day is the difference between a usable record and a guess.
| Field | What to write |
|---|---|
| Coaching assignment in brief | What this piece of work is about, in a line. |
| Agreement / outcome finalised | What the two of you agreed the session would produce. |
| Result achieved | What actually came out of it. |
| Tools & techniques adopted | The models, questions and exercises you used. |
| Lessons learnt by coach | What the session taught you about your own practice. |
| What could have been done better | The honest note you would want a mentor to read. |
| Coachee feedback | What the client said, in their words where you have them. |
| Coach competency development plan | What you will work on before the next one. |
Session Evaluation scores a session you have run against the ICF PCC Markers — all 37 of them — from what was actually said in the room. It is built for your own development. It is a practice estimate, not an official ICF assessment.
Press Session Evaluation on a past session. There are three ways to give it the session, and you only need one.
The report opens with the details of the session — you, the coachee, the date and length, the session topic, when it was reviewed and what it was built from — then the score.
| On the report | What it means |
|---|---|
| The number in the ring | A score out of 100. Every marker is scored 0–3, and the total is expressed as a percentage of the maximum. |
| Markers demonstrated | How many of the 37 markers were clearly evidenced — scored 2 or 3 — in this session. |
| Coach / coachee split | How much of the talking was yours. Worth watching over several sessions rather than one. |
| What worked / Where to grow | The short version, if you read nothing else. |
| Competencies at a glance | The six ICF competencies the markers sit under, scored 0–3 each. |
| Marker by marker | Press View detailed report for every marker with its score, a quote from the session as evidence, and a note. It becomes Hide detailed report once open. |
Press Save as PDF to keep a copy. Your browser's print window opens — choose Save as PDF as the destination instead of a printer. The PDF always contains the full marker detail, whether or not it is expanded on screen.
Session Evaluation is part of the Mentor plan, which includes ten evaluations a month. Every plan — free and trial included — gets one free evaluation, so you can run it on a real session of your own before deciding whether it earns its place.
If you reach the monthly ten, the allowance recovers as your earlier evaluations pass thirty days; nothing else about your plan changes and your transcripts stay where they are.
One button produces the whole log: every session, every client, in date order, with your details in the header and your total coaching minutes at the bottom. It is built for submitting accreditation hours.
The file has one row per session and sixteen columns: session number, client name and email, session date, start and end time, duration in minutes, type of coaching, coaching assignment in brief, agreement or outcome finalised, result achieved, tools and techniques adopted, lessons learnt by coach, what could have been done better, coachee feedback, and coach competency development plan. The last row is your grand total of coaching minutes.
Clients can also be exported on their own: Export CSV on the Clients screen writes out names, contact details, DISC, values, strengths, goals and sessions, which is the file Import CSV reads back in.
Name, email, phone and cohort. Printed on every agreement and in the header of every exported coaching log.
The practice details that appear on every coaching agreement you send.
Session length, fees, cancellation window and notice period, used to prefill new agreements.
Your own versions of the agreement clauses, saved from an agreement and reused. Pick one when you start an agreement, or make one the default so every new agreement begins with it. Pro and Mentor, and during your free trial.
Your own questionnaire questions. Write them here, then pick which ones each client is asked when you create their link. Pro and Mentor, and during your free trial.
Your plan, client and generation usage, billing, and account deletion.
Your referral link and code, who has joined through it, and the free months you have earned. How it works.
Bug, idea or complaint — it goes straight to the person who builds the app.
Everything is stored to your account, so the same practice appears on your laptop and your phone once you sign in. Settings save as you type.
Every account has a referral link. For every two coaches who sign up through it and subscribe, a month of your own subscription is free. Open it from Settings → Refer a coach.
Your access simply runs a month past the period you pay for, and stays a month ahead on every renewal. Nothing about the invoice changes — the provider still charges on its own schedule. If you ever stop subscribing, the earned months run on from the end of the period you last paid for, so you keep them.
The plan you are on when it is paid out. A month earned on Mentor is a Mentor month.
There is no code to redeem and no invoice to chase. The balance and the dates in Settings update on their own once the payment clears.
Nothing extra — the same trial and the same prices as anyone else. The reward is yours.
Credit moves when they subscribe, not when they join. Until then they show under Coaches you brought with no date against them. If they have paid and the count is still behind, give it a few minutes — it updates when the payment clears — then reload Settings.
That is how it works. The month is added to your access rather than taken off an invoice: your subscription runs a month past the period you paid for, and stays a month ahead on every renewal. If you cancel, the earned months carry on from the end of the period you last paid for.
The profile is usually thin. Add core values, strengths and a sharper goal, then press Regenerate plan. The DISC style matters too — it sets the tone and pacing.
Press Check for answers again. The link stays live until they submit, and nothing appears until they finish the whole thing.
They are opt-in per client. Open the client, find What goes in this questionnaire and tick the ones you want; Preview it confirms what they will see. If the whole section is missing, either the client has already submitted, or your plan doesn't include the question bank.
A session log has been saved against it, which locks the details. Edit the log instead, or delete the session and plan it again if the details were wrong.
Your name, email and cohort come from Settings → Your details. Fill those in and export again.
Free and lower plans cap the number of clients and daily plan generations. Settings → Subscription shows where you stand.
Settings → Feedback & support. Say what you were doing and what happened; tick the reply box and you get an answer.